Ensure your roof stands strong against the elements with the right lead corner flashings. Designed to provide durable weatherproofing, our lead flashings create seamless joints that protect your building’s structure and offer long-lasting reliability.
A corner flashing is a building material used to provide a waterproof barrier at the junctions of walls, roofs, or other building components, especially where two surfaces meet at an angle, such as at the corners of a structure.
At Leadworx, we specialise in providing premium lead corner flashings that are as functional as they are easy to install. Whether you need internal corners, flat roof corners, or window trays, we have the perfect solution to meet your needs.



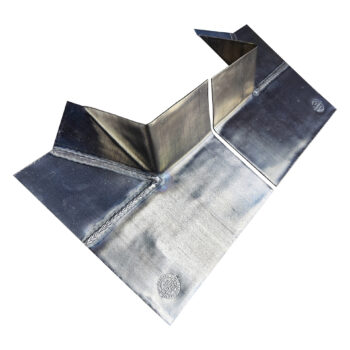


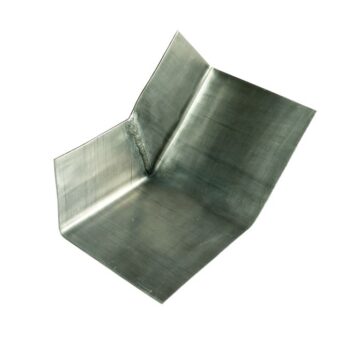
Lead corner flashings are the perfect choice for durable and long-lasting weatherproofing.
Known for their unmatched durability, flexibility, and resistance to extreme weather, lead flashings provide superior protection against water infiltration at critical joints. Their malleability ensures a perfect fit for any structure, while their eco-friendly, 100% recyclable composition aligns with sustainable building practices. Our flashings are crafted from high-quality Code 4 lead and compliant with British Standard BS EN 12588, lead corner flashings offer a reliable, versatile solution that stands the test of time.
Explore our range of lead flashing products and discover the ultimate combination of durability, performance, and ease of use with Leadworx.
Leadworx offers premium lead internal corners designed to provide a seamless and efficient solution for weatherproofing roof intersections. Supplied as a pair (left and right), these pre-formed corners are engineered to fit any roof pitch—simply select the pitch you require for a perfect fit.
LEADWORX TOOLS
Calculate from measurements, or estimate the angle from a photograph.
Measure the vertical rise and horizontal run between the same two points.
Use the same unit for both, such as mm or cm. Run is not the sloping roof length or automatically the full building width.
Enter your measurements to begin.
Enter measurements first.
These formats describe the same slope; they are not product size recommendations.
Use a square-on view of the roof profile, with a known horizontal reference in the same plane.
The photo box opens your camera on supported phones and tablets. On a computer, choose a photo file or drop one into the box.
Processed on your device by this tool. JPG, PNG or WebP, up to 20 MB and 24 megapixels. Export HEIC as JPG first.
Tap the photo box or choose a saved photo.
Tap four points: two on the roof slope, then two on a level reference. Drag points to adjust. Use long lines for a better estimate.
Focus the photo. Arrow keys move the marker; Shift moves 10 pixels. Enter adds a point. Select a placed point below to adjust it with the arrows. Escape returns to the free marker.
No points placed.
Mark the photo first.
The reference line corrects camera tilt, not perspective or lens distortion. A photo cannot guarantee the angle needed for manufacture.
Check the pitch before ordering made-to-measure leadwork. Measure only from a safe, accessible position.